Have a Holly Jolly Christmas! I hope you are enjoying your family and friends not to mention all the holiday goodies you've made.
Day 24
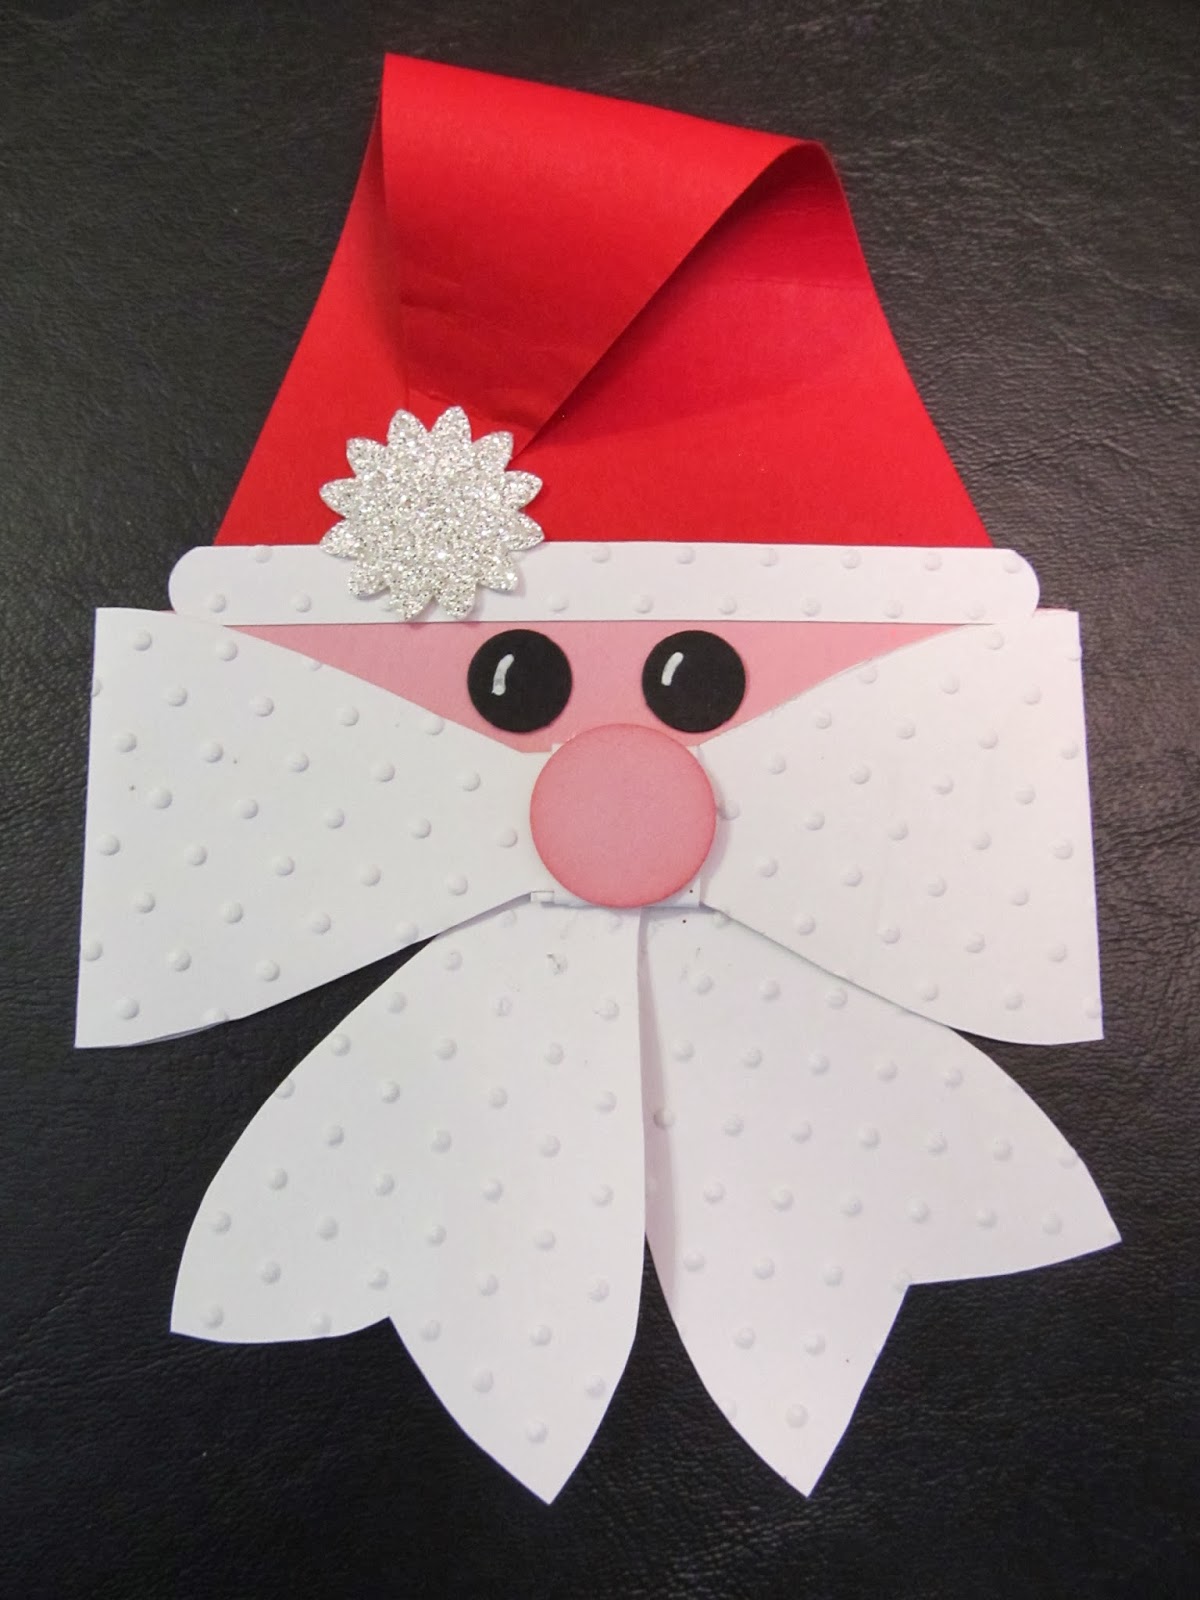
Holly Jolly Santa
Here is one of my favorite Santas...he's Holly Jolly!
And very simple to make.
What a great stocking stuffer!
Supplies
·
#100730 Whisper White CS
·
#102482 Real Red CS
·
#111351 Pink Pirouette CS
·
#121045 Basic Black CS
·
#119847 Ornament Punch (retired)
·
#119859 XL Oval Punch
·
#119855 Large Oval Punch
·
#117191 Bird Builder (for moustache) Punch
·
#118074 Owl Builder Punch (eyes)
·
#130917 Baroque Embossing Folder
·
#102023 Dazzling Diamonds
·
#104430 Dimensionals
·
#100425 2-way glue pen
·
Mini Pom Poms local craft store
Even the Naughty
Deserve Something Nice Tag
Hope you enjoy...thanks for stopping by!
Carolyn:o)


