Sunday, October 25, 2015

See Ya Later Alligator!

Hello! We have 3 ladies who have been training at our Frisco store and now leaving Nothing Bundt Cakes to open their own stores in FL and MO so I wanted to make them a sweet treat!


This little guy is from Reverse Confetti. They are just so cute!

Up Close and Personal


I used the #119247 pearl jewels for the eyes and on one of the gators I colored them with a black sharpie. I also used a fun new product called Wink of Stella to give the teeth/humps a shimmer. My camera couldn't pick up the shimmer...sorry!


Here you can see the shimmer...
it adds another dimension to the image.


I like to have treat boxes/toppers on hand so when I am pressed for time I can just grab it go!

Hope you enjoy...thanks for stopping by!

Carolyn:o)

Tuesday, October 20, 2015

Got Candy!

Hello and Happy Tuesday! A skull and crossbones is usually a warning symbol of poisonous substances and danger, but not here! This is full of Hershey kisses...YUM!!!


For this treat bag I used the #139590 Howl-o-ween Treat stamps#139663 Boo to You Framelits, #139584 Happy Haunting DSP, #139622 Spider Web Doilies,#133770 Gusseted Cello Bag #139608 Happy Haunting Washi tape and #132983 Gold Sequin Trim.

The Measurements for the DSP is:

4" x 8 3/4" score on the long side at 1 1/4" and 3 3/4"

And for the topper:


3" x 4 1/2" score on the short side at 1 1/2"

Hope you enjoy...thanks for stopping by!

Carolyn:o)

Monday, October 19, 2015

The Raven...Nevermore!

Well Hello! I wanted to share with you this Vintage Halloween card I made on my Retreat.


To make this card I used the #139708 Witches Night stamp set, #139605 Black Glimmer Paper, #139584 Happy Haunting DSP and the new #138281 Lots of Labels Framelits. 

Stampin' Up Special

An amazing special that is on right now! Starting October 19 through Friday, October 23rd you can order any stamp set at 15% off. So start making out your Christmas Wish List! This special is not good on bundles, hostess sets, or rotary stamps.

 Hope you enjoy...thanks for stopping by!

Carolyn:o)

Trick or Treat!

Hello! This has been a LONG time coming. And I am so very sorry but I really had a lot going on in September with 2 Weekend Retreats. Just wanted to post my September workshop projects for you.


Howl-O-Ween Treat Boxes


Most of you know how much I love Halloween. For these cute treats I used the #139590 Howl-o-ween Treat stamps and the #139663 Boo to You Framelits along with our super cute #139584 Happy Haunting DSP and #139605 Black Glimmer paper. 

For the Owl treat box the measurements are:

Basic Black: 2" X 11", score at 5" and 6"
DSP: 2" X 6 1/2", score at 2", 3", 5" and 6"

For the Boo treat box the measurements are:

Basic Black: 4" X 4 1/2", 
On the 4" side score at 1/2" on both sides
On the 4 1/2" side score at 1", 1 1/2", 3", 3 1/2"
DSP: 3" X 1"
 
 
Bundle & Save

Save 15% by purchasing the bundle which is the #140840 Howl-o-ween Treat stamps and the Boo to You Framelits.

Hope you enjoy...thanks for stopping by!

Carolyn:o)


Monday, August 24, 2015

First Day of School

Hello and Happy Monday! We are busy getting ready to start the first day of school...woo hoo! I made these cute little treats for the girls at work today.


Back to School Treats


To create the apple and leaves I used two punches which are oldie but goodies...round tab punch/blossoms petal builder. For the stem I used the #117191 Bird Builder punch and for the seeds I used the #138295 Tree Builder punch.


I like to assemble my treats in steps so I do all the cutting, punching and stamping first then I assemble.


Here they are ready to go with Hershey's, M&M's and Kit Kat snack sized candy bars.


Hope you enjoy...thanks for stopping by!

Carolyn:o)

Sunday, August 23, 2015

Sweet Watermelon Boxes

Hello! Summer's end is almost near and the kids are headed back to school. So thought this would be a fun treat box for the end of summer. I CASED this super cute idea from Chris Slogar.

Sweet! Treat Boxes


I filled this little cutie with Hershey Nuggets and Kisses.


To create this box I used the #135853 Curvy Box Thinlit along with #138334 Watermelon Wonder and #138335 Cucumber Crush cardstock.


For the rind I used the #134114 Work of Art stamps and the bone folder to create a curved box and the #135380 Bravo stamps for the saying. Then added some seeds, tied with some fabulous ribbon #138423 Cucumber Crush and ta-da!

FYI: I just wanted to share with you how much I love the new ribbon it is soft and easy to work with...love it!

Hope you enjoy...thanks for stopping by!

Carolyn:o)


Sunday, August 9, 2015

Watercoloring with Aqua Painters

Happy August! Just a couple more weeks and my boys will be back in school:o(. But I think I am ready to be back in a routine.

Thanks Watercolor Background Card


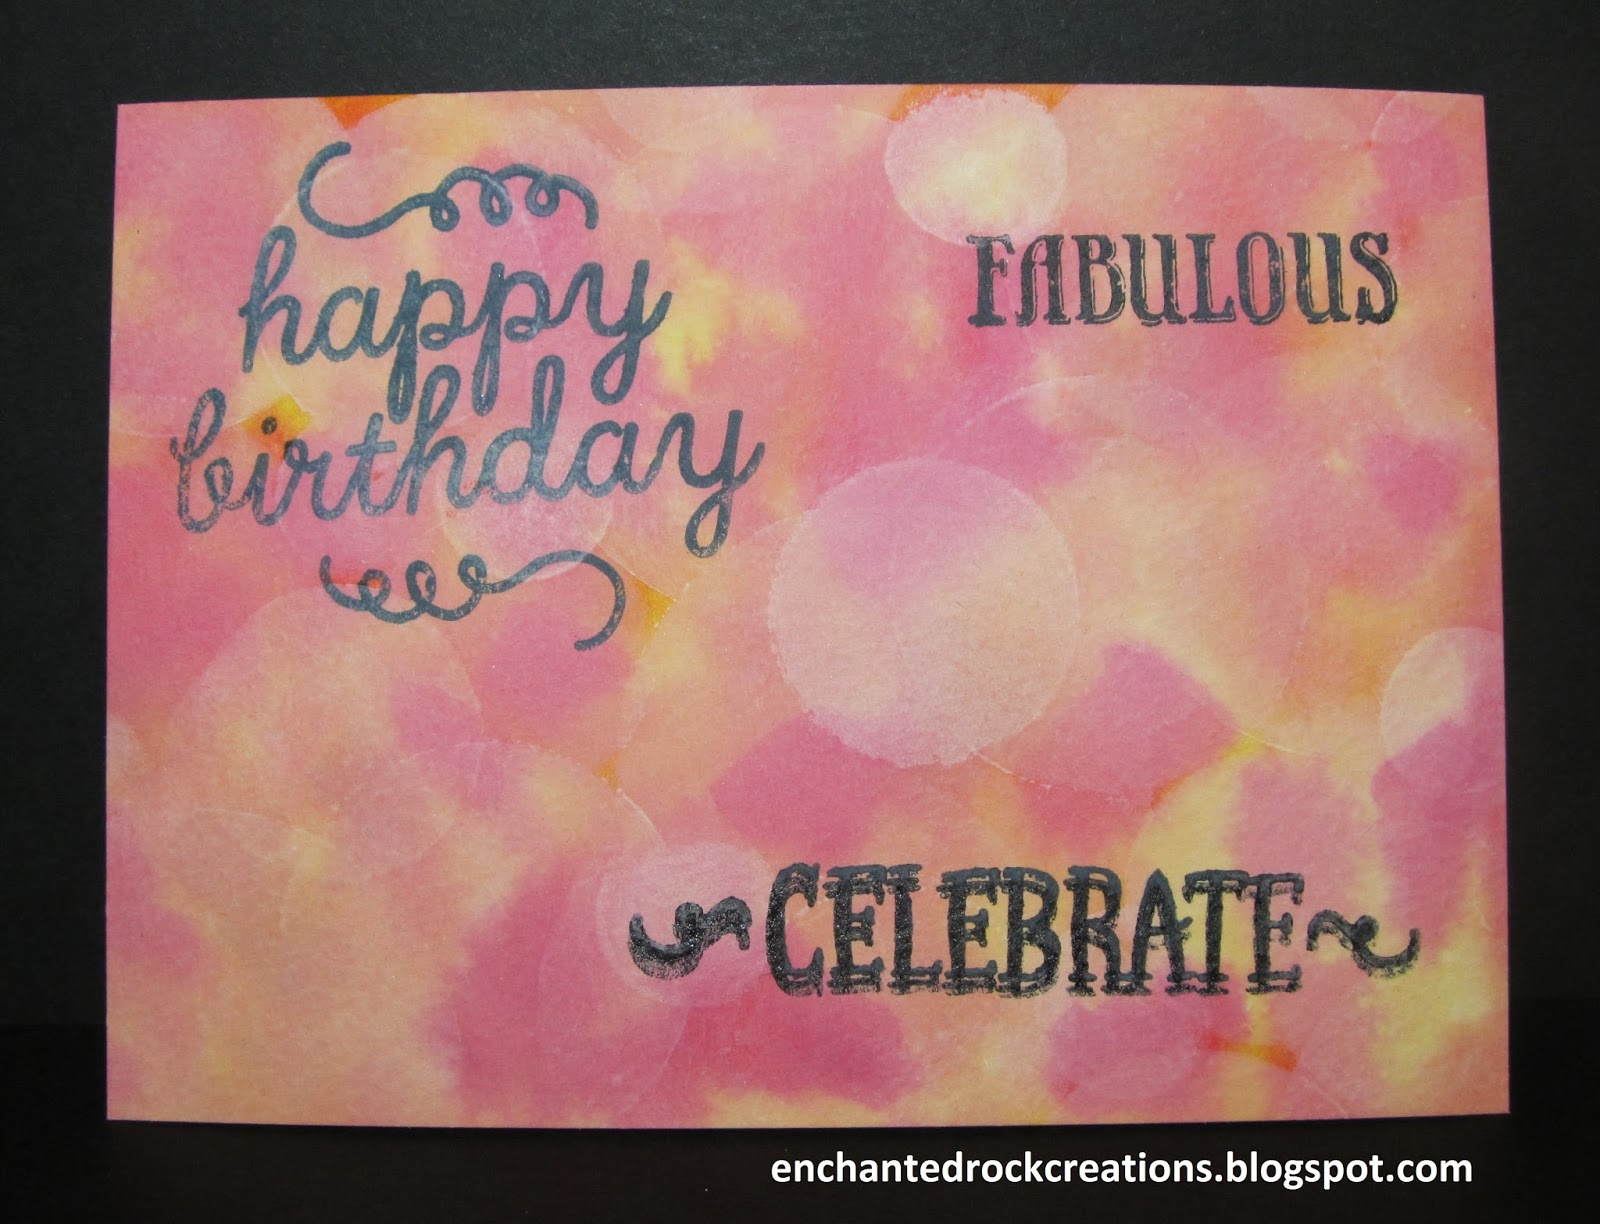
I've seen the Bokeh technique all over pinterest so I decided to try it. This was so much fun...I love to paint! The funny thing is I ended up liking just the vibrant watercolor background more than the Bokeh effect. So this is what I came up with.


I used #115662 Mambo Melon, #119672 Daffodil Delight and #105229 Pumpkin Pie re-inkers for my color combination.


I used 10 drops of water to 3 drops of ink in each container. First I taped my watercolor paper down and then I saturated it with water using the #103954 Aqua Painter. Next, I put dabs of ink randomly with my aqua painter all over the paper starting with my lightest color first. *There is no rhyme or reason to this...just put the color wherever you want. You are the Artist! Also when changing colors make sure your aqua painter is clean so you are ready to add the next color. When it was completely full of color I gently pulled off the tape. The ink dries quickly on the paper. This is the look I liked the best!

Watercolor vs. Bokeh


Which technique do you like?


To continue with the Bokeh Technique I used #101731 White Craft Ink and a circle template which I made using a #114323 Window Sheet and the #130911 Circle Framelets (various sizes). Place the template on the watercolor background and fill in the circle with the white craft ink. You will place your template randomly filling in the circles. Allow the craft ink to dry before you stamp onto the background (this will take awhile) or to speed up the process you can use the #129053 Heating Tool to dry the watercolor paper. When stamping onto the background use the #101406 StazOn Ink.


Hope you enjoy...thanks for stopping by!

Carolyn:o)